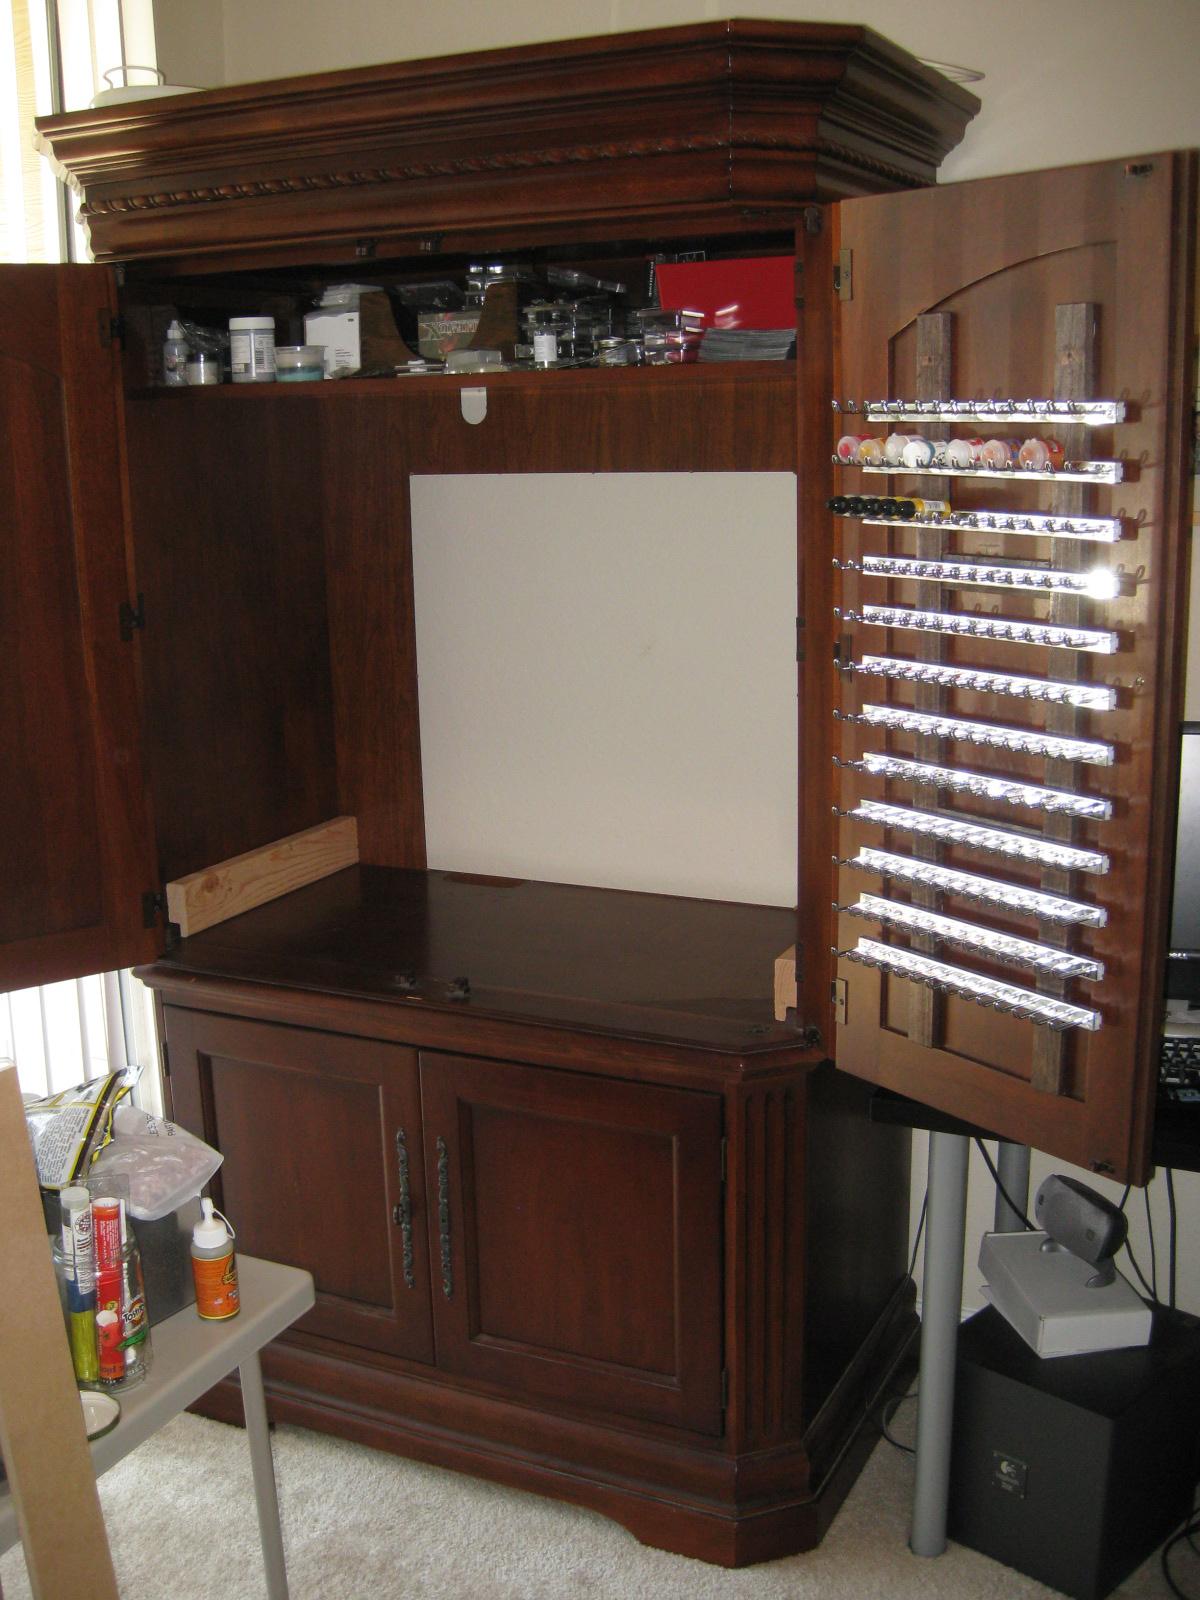
After a handful of minor speed bumps, the paint rack is finished and mounted inside The Monolith.
After realizing the cabinet doors were mounted backwards, I swapped them (phew!), leaving myself with an interesting challenge: The rack was now mounted on the opposite side, upside down, and now interfered with the top internal shelf.
Luckily, the tie racks were reversible, so that meant all I had to do was move the uppermost rack to the very bottom, maintaining my 2.25" spacing. This left some marking and mounting holes in the birch frame, but at this point I wasn't too bothered by that.
I (hastily) picked up some wood stain to darken the frame a bit and kill the contrast. The color I got was a touch too dark and doesn't exactly match the cabinet, but it's still a marked improvement from the original light birch color.

The stain on the rails would be covered, so I wasn't overly careful in slopping the color on.
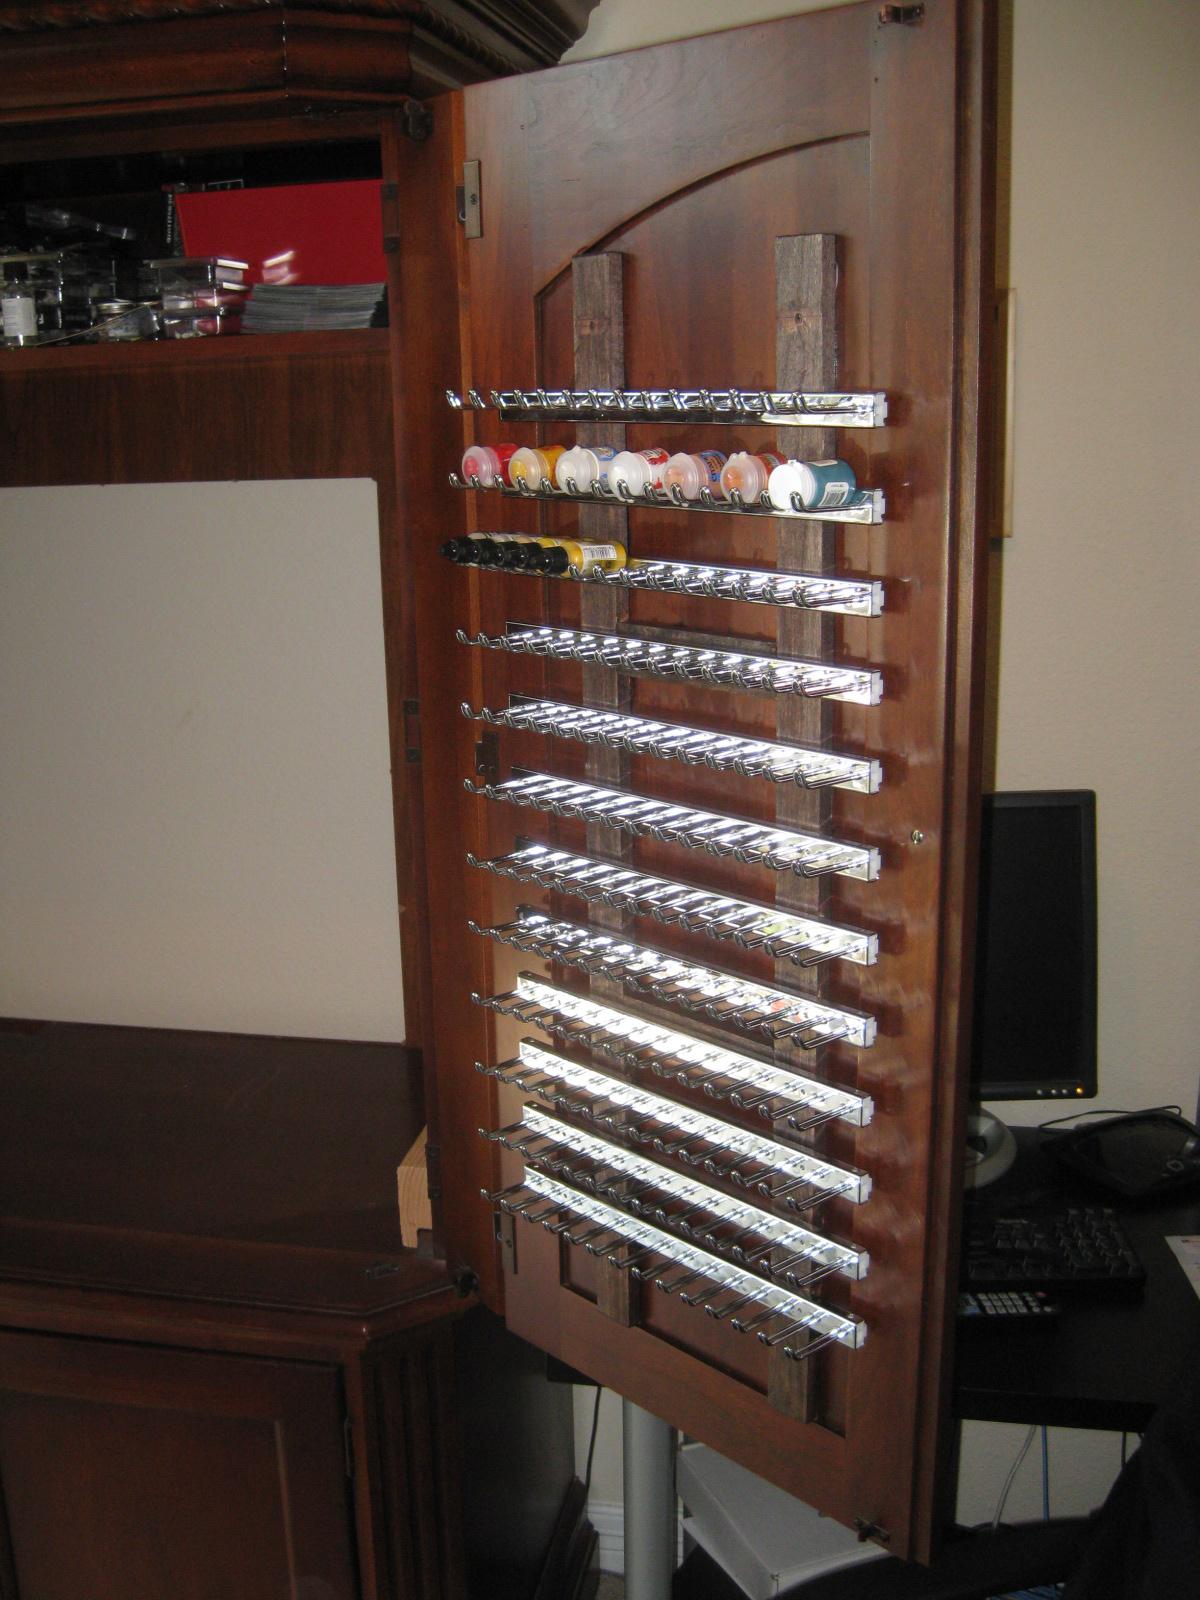
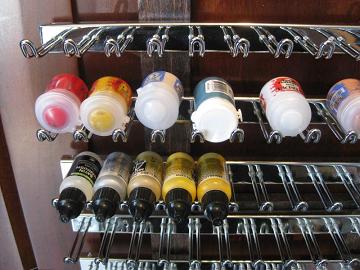
Stained, assembled, and mounted on the new, "proper" side. I'll populate the rack once I retrieve my paints from my buddy's place. Epic Dystopian Wars painting and gaming nights have transpired, and I've left most of my paints there to save time lugging stuff back and forth. I'll have to post my KoB fleet photos at some point. (I've pre-ordered the Russians, can't wait!) But I digress...
Another point: I've replaced the broken door pull hardware.
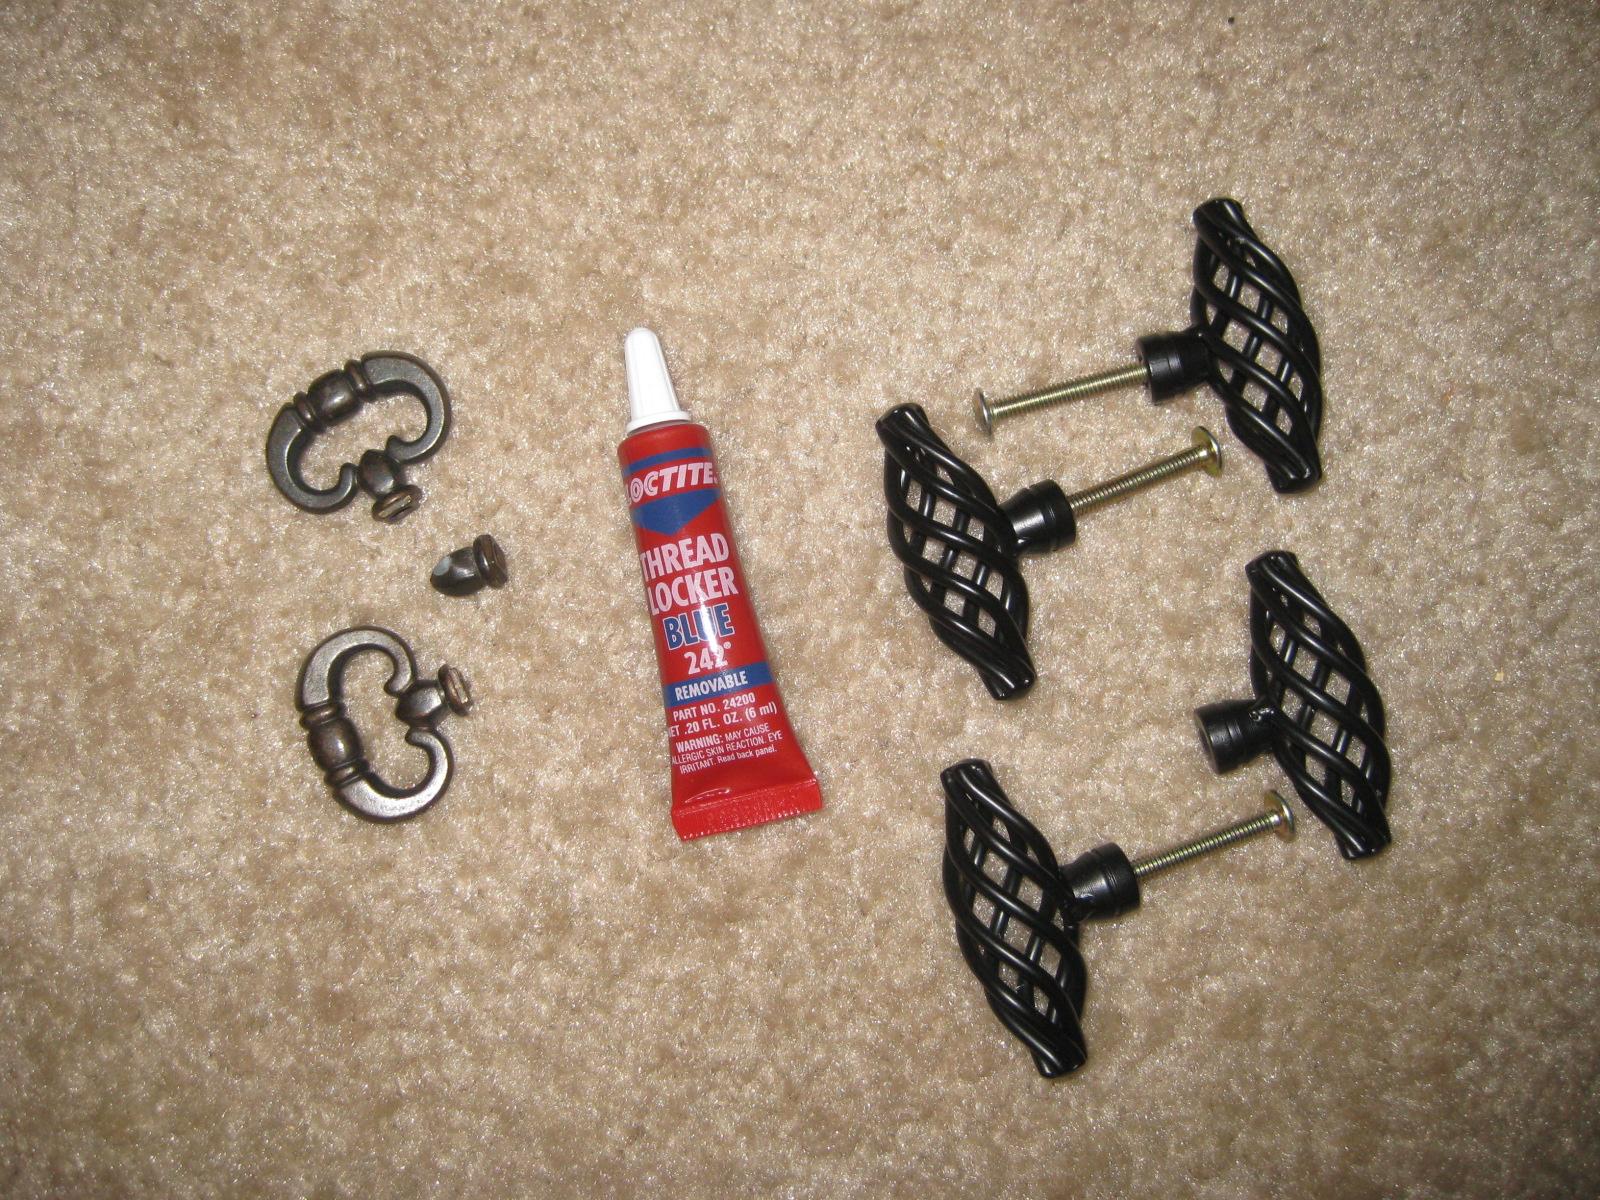
Old and busted on the left, new and groovy on the right.

Again, sorta matches, sorta doesn't. They're larger, and easier to pull. Given the double-panel type doors, they have multiple latches to close. The new hardware helps give a better grip. I like them! And now, the parting shot:
Tadaa!
Next up is the slide-out work space. You can see the 2x4's in the bottom corner, I used a table saw to rabbit cut the corners so they sit flush over the internal braces. The work space will slide out on rails between them, and the cabinet base will mount on top. In my tradition of keeping project "soul" intact, I'll be cutting up the top of my old hobby desk to make the cabinet base. That way a little piece of the old is a part of the new. And fear not, the next pot of wood stain will be a better match!
glad you are back! Great job on the rack
ReplyDeleteMike
SCWH
Now that is seriously clever! What a great result with the tie rack.
ReplyDelete@SC Mike: Thank you, it's great to be back in the hobbying spirit!
ReplyDelete@Michael Awdry: Glad you're digging it!
I've made solid progress on the desk top and slide-out. Once the wood stain dries (takes forever and a half) I'll toss a couple coats of Urethane on, and we'll have an update!
I've been watching this project and find your posts really helpful. I have an entertainment armoire I'm not using (hello, flatscreen) and I've thought about repurposing it for hobbying, but haven't figured it out yet. I may never get to it, but if I do I'll be using a lot of your ideas. Keep it up, can't wait to see the finished product!
ReplyDelete@40k Giveaway: That's another fact that spurred this project into existence. So many people have upgraded their televisions, trading out huge boxes for flat panel plasma/lcd/led units and leaving this massive entertainment centers collecting dust. That works for me, as it meant a huge number for sale in various secondhand stores, mostly dirt cheap!
ReplyDeleteIf you do decide to take the plunge, feel free to pick my brain for any suggestions or ideas. Likewise, if you see anything cool that I could add or change, chime in! I'm basically flying blind at this, making it up as I go along. No rocket science here. I scribble a lot of random drawings and notes at work or in class, then I spend a couple hours in the home improvement stores trying to figure out the best way to make these ideas come to life. So far, it's been an absolute blast, and I encourage you to give it a try!